B2 Using carousels and pop-ups
Download PDF Version
1. What are Popups and Carousels?
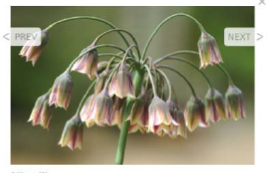
1.1 Popups
Popups show your enlargement images in a stylish popup box. Not only can they look really professional, but it is quicker for your users to scroll through your gallery enlargements because they do not have to reload the page. They’re also easy to set up. If you’d like to see one, follow this link to Tim Sandall’s website and scroll through his enlargements.
1.2 Carousels
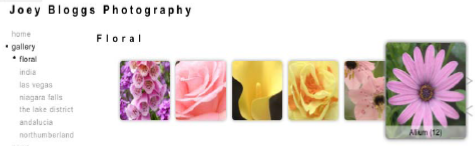
Carousels show a group of thumbnail images in a stylish carousel-like format. They can replace the way your thumbnails are presented in your galleries and/or you can add them to various parts of your site. We have some really snazzy carousel styles. From our Large carousel (Tight) style, which expands the thumbnail when the user hovers over it (see right) – to our Ticker carousels, which automatically scroll through the images in a fancy way, without the user having to do anything. They are also HTML5-friendly, which means they can be viewed on mobile phones and tablets.
2. Setting them up in your galleries
This is controlled in the respective gallery section record, so go to Content Sections Click on edit against your gallery section record, the pencil end right Scroll down until you see the fields in this image.
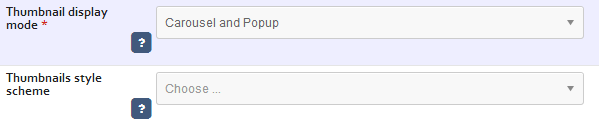
If you would just like your enlargements to appear as popups with no carousels, select Popup under Thumbnail display mode SAVE. That’s it! Now Preview and see how your enlargements look.
If you would like your gallery thumbnails to be displayed in carousel format but with no enlargement popups, select Carousel.
For a combination, select Popup and carousel.
Now you choose a carousel style from the selection in the Thumbnails style scheme field. As you can see there are plenty to choose from. Please note the following:
We generally recommend entering each style in turn and then looking at a Preview to see them. Whilst the admin system provides a single image preview of each style, you can’t really appreciate them unless they are on a live site. For the ticker styles, you will need to wait a few moments before the thumbnails start moving. *In all instances you can change the number of images that appear, both vertically and horizontally (see 4. below for instructions).
3. Putting a carousel of images anywhere on your website
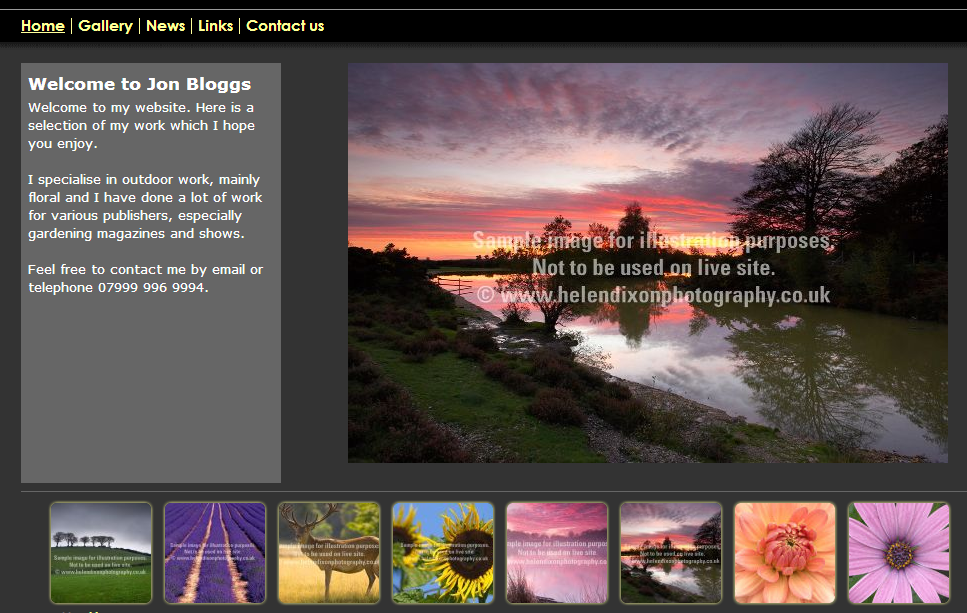
Our Other content feature allows you to add a carousel of images to just about anywhere on your site. It can be applied to the entire site, or just the sections you select. In this example we are going to add a carousel to the footer of the website, which will show on all pages (although you can quite easily apply it only to your home page). There are two stages depending on which images you would like to use in the carousel:
If you would like to specify your own selection of images, start at Stage I.
If you would like to use the images you may have assigned as gallery headings (which will link through to the respective gallery if the user clicks on it), then move straight to Stage II. Bear in mind you have to have sufficient gallery headings to populate the carousel!
Stage I: Set up an Image set and assign the images to it
*Go to Images/Galleries Image sets Click on New Enter a name for your own reference, eg Carousel SAVE. *Now you need to tell the system which images you would like included by assigning them to the Image set you have just set up. This is done by going to the respective Image record There is a field called Image set Click on the blank box and a list of image sets appears Click on the Image set you have just created SAVE.
Stage II: Creating the carousel and adding it to your site
Go to Content Other content Click on Add content item Under Type select Image panel Give it a name for your own reference Click ADD CONTENT ITEM. At the next screen, ignore all of the fields with the exception of the following:
Apply to sections. Select Show on all sections. Unless of course you’d only like it to appear on one or more specified sections, in which case you’d select Only show on the sections selected.
Sections. Leave blank, unless you’d like it to appear on one or more specified sections, in which case you'd select which ones here.
Position. Select the position you’d like the carousel to appear. In this case Footer.
Images to display. Select Image set. Or if you would like to show your gallery headings, select Gallery index. As a third option, you can ask to show random images from a specified gallery.
Image set. Select the Image set you created.
Gallery mode. Choose Carousel.
Style scheme. Select which sort of carousel you would like. It may be worth trying a few here such as Large carousel (Tight).
Max records. This can be really useful if you have too many images in the carousel and they overflow into a second row. Leave blank for now and come back to it if this happens.
SAVE and Preview.
At this point it may be worth trying some different carousel styles and/or setting a maximum number of images to appear. Likewise, adding or removing images from your Image set.
4. Settings options
There are a variety of settings you can change with your carousel and we summarise the most commonly used ones below. These options can be edited in the admin system by going to:

Click on Preview in the admin system In your preview, go to the page where your carousel is Click on the grey edit button in the top left corner Click anywhere on your carousel A pop-up box will appear. There are mnay options to customise, here are some of the most important.
Grid settings Display mode Ensure this is set to carousel carousel.
Grid settings Rows and Columns. Enter however many rows or columns you would like the carousel to appear in. For example, if you would like the carousel to work from top to bottom, rather than across, you would enter ‘1’ for Columns and however many images you would like to appear for Rows.
Thumbnail height. Enter a figure in pixels to change the limit the thumbnail size. The width will vary according to the rows and columns.
Grid settings Caption position. Choose where the caption appears in realtion to the image. Overlay options are most effective for carousels. With these positions, you can also select Caption rollover.
