E3 Background colours and images
Download PDF Version
1. Introduction
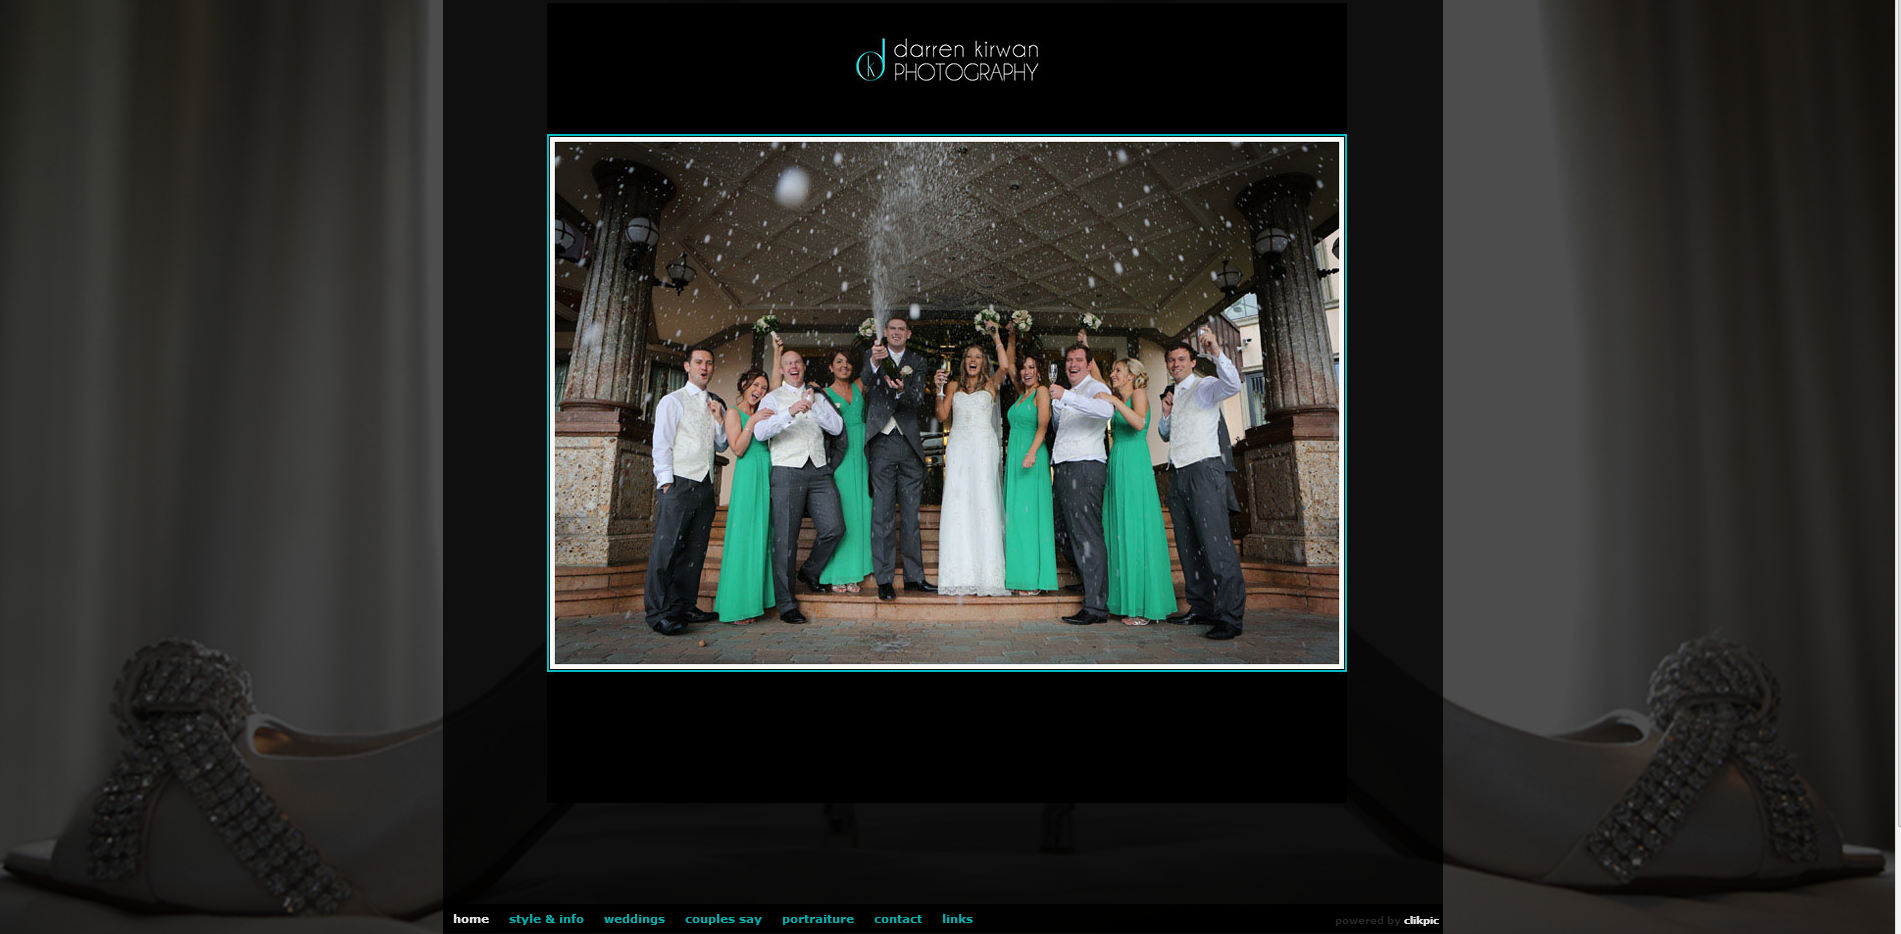
By ‘wall-papering’ your website with a background image or colour, you can add a subtle feel to the style and brand of your site. In this example, Darren Kirwan has cleverly added images of luxury wedding items which helps to portray him as a quality wedding photographer. Likewise, outdoor photographer Helen Dixon has added an image of tree branches which she has subtly faded to give an outdoor feel to her site at www.helendixonphotography.co.uk. In this guide we show you how to:
Add a background image to your site.
Adjust the opacity of the image. That is the strength it appears (opacity meaning the opposite of transparency).
You can optionally prepare an image to the dimensions required, or ask the system to stretch it across the entire view, or replicate the image on a ‘tile’ basis so that it fills the space.
Alternatively add a background colour.
If so, you can merge from one colour to another, which can look quite fancy.
You can also apply all of these background features to certain parts of a web page, such as the footer.
2. Adding an image/s to your site background
2.1 Selecting the image/s
Firstly, prepare an image of your choice with the dimensions you want and save it to your computer. (For obvious reasons, landscape-shaped images work best.)
If you want to use image/s that you have already uploaded you can tell the system which ones you would like to use by going to the respective image record in Images/Galleries Images. Click on the field Image sets, and select Background images SAVE. If you select more than one, then they will rotate.
2.2 Edit the body container in preview edit
Preview your site and click Edit. Slide the layer slider all the way to the left so the body is selected. Click on the body to edit it.
Then click “Main settings”.
At this point we would recommend using the Stretch system, so click on Stretch background. This will automatically size your image to fill the whole browser window.
Expeand the Image settings.
IMPORTANT if you are using a strech background, please ignore all the other settings. These were a legacy to cope with older browsers.
qType. Select from the drop down list. Select Custom image if you have saved the image to your computer. Choose Select from image set if you are using an image/s that’s already uploaded.
wImage. If you have not selected Image set then browse your computer for the image.
eImage set. Alternatively, if you are using one already on the system select the image set, usually Background images.
rUPDATE and Preview.
3. How to change your site’s background colours
3.1 Introduction
Instead of an image you can add a colour. You can even select two colours and ask the system to add a gradient so they gradually merge from one to the other, either top to bottom or side to side.
3.2 Selecting a single colour
review your site and click Edit. Slide the layer slider all the way to the left so the body is selected. Click on the body to edit it.
Open the main settings and click on Background.
Expand the Colour section. Select one of your colours. If your colour, is not there, close preview edit and return to the colours tab in Styling Custom settings.
3.3 Using two colours and a gradient
This allows you to gradually merge from one colour to the next. To do this, follow the steps in 3.2 to set the start colour, and then click on the + Gradient button to set the end colour as follows.
Gradient end colour. Enter the colour ref here or click on the small cross to bring up the colour picker chart and select your colour. Click anywhere to remove the picker. Set. Click and Preview.
You can also specify a start and end point for your gradient, which is what the other fields are for. That said, these start and end points can’t always be seen in Internet Explorer. Still, you can try it as follows:
Start (H). The starting point for the horizontal gradient. Enter, say, 200 (for pixels), and the gradient will start 200 pixels down the screen. To a degree, this is a question of trial and error until you get a feel for where the pixel numbers relate to. Direction. If you select Vertical, the gradient will go from top to bottom. And Horizontal will take it from left to right. Start (V). The starting point for the vertical gradient. End fields. If you would like to specify an end to where the gradient appears, enter the figures here.
4. How to change background colours on other parts of your site
If you would like to change the background colour of an element/container within a web page this can be quite easily done using Preview edit. Click on Preview in your admin system and in the top left of the Preview screen, click on Edit.
Click on the part you would like to edit. Open colours and dimensions.
If the item is a container, you can edit the background there. For a content section, you will need to expand Other styling.
If it doesn’t look right or doesn’t seem to work properly, it could be that the site style you have chosen or the way you have set the page up, makes it unsuitable for a background colour change.
4.1 Adding overlay backgrounds to content
You can creat overlay content sections where the text overlays an image in two ways.
qOne, you can add a background image in the normal way to a container section and then place a content section within it. This offers more control and is easier to style. It's best if you're not likely to edit your content that often.
wThere is also an additional option for general content sections where you can use the main image for the background.
To do this, create a new general content section with an image. Preview your site and edit. Select the item and expand Colours and dimensions Other styling. Edit the background image, open the image section and edit the type. Select Use content image. Edit Background image stretch and select Cover.
Important then go back to Size and Alignment and give your section a minimum height to ensure most of the image shows.
Then add styling for the text in the Sub elements tab.
Use style schemes to style multiple items
If you're going to add multiple overlay items, create your own stylescheme and apply it to each item. See
«cliktip»
